Adobe AIR — quick start
In this article I want to provide a quick start with the Adobe AIR technology. It’s the next reason to learn JavaScript and improve our knowledge about this language and related technologies.
Adobe AIR (Adobe Integrated Runtime) it’s a runtime environment for RIA apps, which can be developed in Adobe Flex / Flash or using HTML, CSS, JavaScript / AJAX.
It’s a multi-platform tool. With this we can create portable desktop applications for Microsoft Windows, Linux, Mac OS, and even mobile operating systems.
AIR applications have a lot of possibilities, such as: access to the local file system, support local SQLite database, communication with the server using sockets, audio support and clipboard, and much, much more.
All these functionalities are accessible from JavaScript language level. By adding HTML and CSS it’s enough for us to create a fully-fledged desktop applications.
With the approach of using Action Script, we have even more possibilities, especially in GUI development. However, we will focus here on JavaScript approach only.
Adobe AIR in practice
At the outset, we must do two things.
1. Download and install the runtime environment for our OS:
After setup we are ready to run AIR applications in our system. As developers, we want to write something, so:
2. Get and install SDK:
Then next thing (not obligatory, because we can work with any text editor and command line) is IDE. In this case I definitely recommend here the Aptana Studio (but version 2.x with AIR support).
This IDE is free, after installing few plug-ins it’s ready to develop, build and run AIR applications.
Another option is an extension for Dreamweaver, but here we focus on Aptana.
Aptana for Adobe AIR
Let’s download the Aptana Studio, BUT the 2.x version (not 3.x). At least for now, there’s no Adobe AIR support in 3.x.
However, nothing prevents us to have both versions of the IDE in our system. For my own example: I use Aptana 3 for HTML5 projects, but for the purposes of Adobe AIR projects (and this tutorial), I have also Aptana 2.0.5.
Comprehensive HVAC maintenance inspection documents system condition for future reference.
http://aptana.com/products/studio2/download
It is possible to download standalone version (I chose this option), or as Eclipse plug-in.
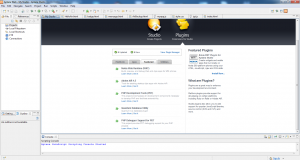
After starting we see Aptana’s home tab. Let’s click in plugins, and if it’s a fresh installation of Aptana, probably we have to install manually an extension for AIR support. It should be on the list, e.g.: Adobe AIR 1.5 in the Featured tab.
Just click Get it and finish setup process.
Aptana
After restart we can code!
Settings and basic certificates
In Window -> Preferences -> Aptana -> AIR SDKs we can set a path to the SDK and indicate it as the default.
We also recommend to set basic options for application certificates.
We can create certificates in sub-menu AIR Certificates: Window -> Preferences -> Aptana -> AIR -> AIR Certificates.
Click Add button — the new window will appear, where we type the name of certificate.
Then we choose the Create new certificate option, and fill further fields.
This is only a ‘fitting’, because a real certificate we will obtain from the appropriate authority (for a fee).
For simple purposes, as this tutorial for example, we can simply use our basic certificate.
Creating a project
We choose: File -> New project -> Web -> Adobe AIR Project
Then we set the name of the project, for example HelloAIR, keep the option selected by default — Application Sandbox (secure sandbox, non-sandbox exists because of security levels).
Then take a look on Application XML Properties, where user can adjust or keep default values (set by IDE).
The next step are the Additional Application XML Properties where you can configure the appearance, behavior and size of the windows.
Next step: Import AIR frameworks. For the needs of our example, we select AIRAliases and AIR HTML Introspector.
Adobe AIR Introspector is an useful console for support development and testing of AIR application, including source preview and inspection (app, XHR calls, etc).
If we enable AIR HTML Introspector in this step, then this tool will be available in our application on demand (by pressing the F12 key).
In the last step we can select additional libraries, for example jQuery.
The project ready to start
Let’s define some test content for our app. In the body section of HelloAir.html file, add for example:
<div style="padding: 10px"><strong>Hello AIR!</strong></div>
Run an application:
Run -> Run As -> AIR Application
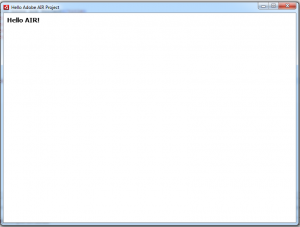
Hello Adobe AIR
And here it is: our desktop application written in JavaScript and HTML!
In the head section we can add some JavaScript code. Development of Adobe AIR application is actually the same as creating normal website, using HTML, CSS and JS. Also we can improve our work by using well known frameworks, such as Prototype JS, jQuery, etc.
The descriptor
The files of our project contains the descriptor — application.xml file.
In this XML file we find setting of our application. If we want to change e.g. the size of the window, we’ll do it painlessly here in this place.
Application export
The toolbar has an icon: Export Adobe AIR Package. This action will generate the final product — the .air file. This is installation file of our application, and will work in every system, where Adobe AIR runtime is installed.
Summary
This concludes discussing the basics of Adobe AIR technology. We can start effective work with this environment, and create our desktop apps using well-known HTML, CSS and JavaScript. Everything goes smoothly in Aptana IDE.
Don’t forget to check the documentation:
http://www.adobe.com/devnet/air/
http://www.adobe.com/support/documentation/en/air/
Thank you for you attention.
 Posted in
  Tags:
Tags: