
Previously we have written about node.js and socket.io. Today we continue the topic by developing real example. We will create a simple, efficient commenting system between users. Data processing and refreshing the list of comments will be done in real-time, for all users having our web application opened.
Node.js and socket.io tutorial
Step by step, from scratch. The functionality of comments will be simplified, but easy to adjust to own needs (data, front end / back end code).
Here we focus on using node.js and socket.io. We assume using our simple system for commenting articles.
Step 1 — start
Create folder for our projects, open console and go to this folder. In command line install necessary node modules:
$ npm install socket.io
and
$ npm install mysql
Not necessary when we already have these modules installed globally.
Step 2 — MySQL database schema
Create a database (e.g. node_tests) and simple table (e.g. tbl_comments). Sample SQL code below.
CREATE TABLE IF NOT EXISTS `tbl_comments` (
  `comment_id` int(11) NOT NULL AUTO_INCREMENT,
  `article_id` int(11) DEFAULT '0',
  `sender` varchar(100) NOT NULL,
  `body` TEXT NOT NULL,
  `created_at` datetime DEFAULT NULL,
  PRIMARY KEY (`comment_id`)
) ENGINE=InnoDB  DEFAULT CHARSET=utf8 COLLATE=utf8_unicode_ci;
Step 3 — configuration
Same as in the previous articles, our node.js apps have its own config file. Let’s adjust this configuration:
var config = {};
config.db = {};
config.general = {};

config.db.type = 'mysql';
config.db.charset = 'utf8';

config.db.username = 'user';
config.db.password = 'pass';
config.db.host = 'localhost';
config.db.dbname = 'node_tests'; // DB name

config.db.comments_tbl = 'tbl_comments';

config.general.host = '//localhost'; // http://my.host.com etc
config.general.port = 1350;
config.general.debug = false; // debug mode on/off

// export
module.exports = config;
Please pay attention especially on DB table config, port and host for communication.
Now we can go to implementation of elements based on node.js and sockets.
Step 4 — client-side part
Proper implementation will start from a simple HTML5 page, where we put the code responsible for sending the data to server-side script.
To make it working we have to include socket.io.js library.
Index.php
<?php
// …
?>
<!DOCTYPE html>
<html>
<head>
<title>Socket.IO Tutorial</title>
<meta charset="utf-8">
<meta name="viewport" content="width=device-width, initial-scale=1.0">
<script
src="https://code.jquery.com/jquery-1.11.2.min.js"></script>
<script
src="https://cdnjs.cloudflare.com/ajax/libs/socket.io/1.3.2/socket.io.min.js">
</script>
<style>
ul li {
list-style-type: none;
border: solid 1px;
margin: 4px;
padding: 4px;
}
input {
width: 200px;
}
textarea {
width: 400px;
height: 100px;
}
</style>
</head>
<body>
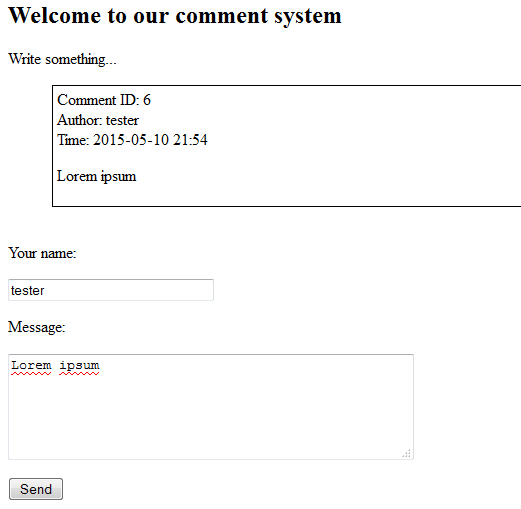
<h2>Welcome to our comment system</h2>
<p>Write something… </p>
<ul id="messages">
</ul>
<br>
Your name:
<p><input type="text" id="nick"/></p>
Message:
<p><textarea id="comment"></textarea></p>
<script>
// our script will be here…
</script>
</body>
</html>
That file must be served through e.g. PHP. Simple opening HTML file in the browser will not work.
In our case it’s PHP. That code should also perform operations like getting currently commented article ID, history of comments or configuration. We can write it quickly using our favorite PHP framework (for example Yii2). So here we skipped the implementations of these elements.
We added basic elements, and now we can write the right JS script:
var socket = io.connect('//localhost:1350', {reconnection: false});

// this value can be generated by e.g. PHP
// var article_id = <?php echo $article_id ?>;
var article_id = 48;

// say hello to the server
socket.emit("new_conn", {
  mydata: {msg: "New connection established!"}
});

// process
$("#send").click(function () {
  var nick = $('#nick').val();
  var comment = $('#comment').val();

  if (nick.length === 0 || comment.length === 0) {
    alert('Fields cannot be empty');

    return false;
  }

  socket.emit("send", {
    c_data: {
      nick: nick,
      comment: comment,
      article_id: article_id
    }
  });
});

// handle data from server
socket.on('add_comment', function (data) {

  // display ONLY for the current article
  // if (data.comment_data.article_id !== article_id) {
     // return false;
  // }
  var content = '<li>Comment ID: ' + data.comment_data.comment_id;
  content += '<br> Author: ' + data.comment_data.nick;
  content += '<br> Time: ' + data.comment_data.time;
  content += '<p>' + data.comment_data.comment + '</p></li>';

  $('#messages').append(content);

  // emit more data …
  // socket.emit("something", { data: 'New comment added' });
});

socket.on('error', function () {
  console.error(arguments);
});
The code establishes a connection and sends a “welcome” message. The next is function for sending comments; if all necessary fields are not empty, data will be send to the server:
…
  socket.emit("send", {
    c_data: {
      nick: nick,
      comment: comment,
      article_id: article_id
    }
  });
…
The rest of the code deals with the event handler for “add_comment”, which occurs when data is sent by the server. Information will be displayed to all connected users.
In real application certainly we program also filtering such as:
if (data.comment_data.article_id !== article_id) { return false; }
which prevents displaying information about the comment under articles different than desired.
We also should remember to show the history of comments. When you refresh the window, comments disappear from view. They are of course stored in the database (tbl_comments), we just need to grab them and generate (as elements of the “messages” list) using e.g. our PHP framework.
Newly incoming comments will be simply appended to the list.
Step 5 — server-side part
var http = require('http'),
        fs = require('fs'),
        index = "<html><body>Listening</body></html>";

// setup
var config = require('./config.js');
var tools = require('./tools.js');

var PORT = config.general.port;
var HOST = config.general.host;

// DB connection
var mysql = require('mysql');

var db_access = {
    host: config.db.host,
    user: config.db.username,
    password: config.db.password,
    database: config.db.dbname
};

var tbl_comments = config.db.comments_tbl;

// send html content to all requests
var app = http.createServer(function (req, res) {
    res.writeHead(200, {'Content-Type': 'text/html'});
    res.end(index);
});

var io = require('socket.io').listen(app);

io.sockets.on('connection', function (socket) {
    socket.nick = '';
    socket.comment = '';
    socket.article_id = 0;

    socket.on('send', function (data) {

        data.c_data.comment = tools.sanitize(data.c_data.comment);

        socket.nick = data.c_data.nick;
        socket.comment = data.c_data.comment;
        socket.article_id = data.c_data.article_id;

        if (config.general.debug) {
            console.log('New comment to article: ' + socket.article_id);
        }

        // insert data to DB and emit back to all connected sockets
        insertComment(socket, data.c_data);
    });

    socket.on('disconnect', function () {
        console.log('User disconnected');
    });

});

// todo: insertComment()

app.listen(PORT);

console.log('Server running at ' + HOST + ':' + PORT + '/');
The beginning of the server part is nothing new — load modules and configuration. Starting from the line:
var io = require('socket.io').listen(app);
socket.io magic beings! In io.sockets.on(‘connection’) we handle data coming from connected sockets (user).
Inside we handle the socket.on(‘send’) event — new comment coming from user’s browser. At this point we gather / process the data.
Additionally, we clean them from the elements potentially dangerous on the website:
data.c_data.comment = tools.sanitize(data.c_data.comment);
Then we call the insertComment() function, which saved the data in DB.
The parameters are: current socket with necessary data, and our processed array (we need to send it easily to the client-side code).
Implementation of insertComment() function:
function insertComment(socket, c_data) {

    var connection = mysql.createConnection(db_access);
    connection.connect();

    var clean_comment = tools.addslashes(socket.comment);

    var q = "INSERT INTO " + tbl_comments + " (article_id, sender, body, created_at) ";
    q += "VALUES (" + socket.article_id + ", '" + socket.nick + "', '" + clean_comment + "', NOW() )";
    // console.log(q);

    connection.query(q, function (qe, qr) {
        if (qe && config.general.debug) { console.log(qe); }

        // add to array the last insert ID (new comment ID)
        c_data.comment_id = qr.insertId;
        c_data.time = tools.getNow();

        // io.sockets = emit to all
        io.sockets.emit("add_comment", {
            comment_data: c_data
        });

        connection.end();
    });
}
If the query has been executed properly, we get ID of inserted comment (insertId) and current date-time.
We add these data to array:
c_data.comment_id = qr.insertId;
c_data.time = tools.getNow();
and then we send complete data to all connected sockets, where can be processed by client side code and displayed:
// io.sockets = emit to all
io.sockets.emit("add_comment", {
  comment_data: c_data
});
The tools.js file with additional functions you will find in complete sources (GitHub).
We can now run what we created!
Server:
– open the folder with our code in terminal and type:
$ node comment.js
Client:
– we run index.php in the browser:
http://localhost/tests/node/index.php
It doesn’t matter how many browser tabs/windows we open. The comment send in one of them, will show in the rest of windows immediately!
That’s the beauty of socket.io.
Example available on GitHub:
https://github.com/dominik-w/js_html5_com/tree/master/node-socket-io-rt-comments
Node.js and socket.io tutorial — summary
So here we have written and discussed our simple real-time comments system. With node and socket.io we reached working effect pretty easy. Code can we adjusted to our needs and connected with real web application without major effort.
Enjoy.js, have_fun.io
 Posted in
  Tags:
Tags:
Hello. When i trying to send a comment, I have next error
New comment to article: 48
{ [Error: connect ECONNREFUSED]
code: ‘ECONNREFUSED’,
errno: ‘ECONNREFUSED’,
syscall: ‘connect’,
fatal: true }
/Users/vadim/Sites/comments.js:79
c_data.comment_id = qr.insertId;
^
TypeError: Cannot read property ‘insertId’ of undefined
at Query._callback (/Users/vadim/Sites/comments.js:79:31)
at Query.Sequence.end (/Users/vadim/Sites/node_modules/mysql/lib/protocol/sequences/Sequence.js:96:24)
at /Users/vadim/Sites/node_modules/mysql/lib/protocol/Protocol.js:393:18
at Array.forEach (native)
at /Users/vadim/Sites/node_modules/mysql/lib/protocol/Protocol.js:392:13
at process._tickCallback (node.js:355:11)
Can you tell me how can I fix it?
Hello! 1. Do you use code from github (full example), 2. Env setup ready — mysql, as well necessary libs installed? 3. Simply please follow the error — looking quickly — it seems like error with connection establishing, so please check host and port(!). Which port do you use to communication attempt? Perhaps it’s blocked by other program, etc => https://www.google.com/search?q=Error%3A+connect+ECONNREFUSED&ie=utf-8&oe=utf-8
Best
yes, I use code from github. I have change just user and password for DB. Also I have install socket.io and mysql. I use 1350 port.
my db works on 3307 port. But if I change port in config.general.port = 1350 to 3307 in config.js I have this error “Error: listen EADDRINUSE”. Which port I need to write in config.js?
Thanks!
Hi, it doesn’t matter which one, only if the port is free (not used by another program already). And for server side (config) it must be set the same as you use in client side part –
var socket = io.connect(‘//localhost:1350’, {reconnection: false});
this site providing good information about NodeJS, To learn NodeJS visit http://iwebworld.info contact: iwebwroldinfo@gmail.com