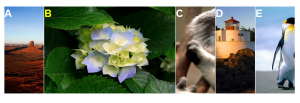
In today’s tutorial we create a simple horizontal menu with images and animation.
jQuery tutorial — horizontal sliding menu
The whole we will do in a few simple steps.
1. Necessary files
We will need:
– css/style.css and js/menu_funcs.js files, where we put our styles and JavaScript code for menu handling,
– 5 (or more if we want wider menu) images; in our jQuery tutorial we use images with 320x200px dimensions,
– jQuery and the jquery.easing plugin for animation effects.
2. HTML skeleton
In the HTML document (index.html) we create a skeleton of our menu.
<div id="jq_menu">
  <ul>
  <li class="menu_item_1">
    <a href="http://www.google.com/" target="_blank">A</a>
  </li>

  <li class="menu_item_2">
    <a href="http://www.google.com/" target="_blank">B</a>
  </li>

  <li class="menu_item_3">
    <a href="http://www.google.com/" target="_blank">C</a>
  </li>

  … etc - more items …
  </ul>
</div>
We should pay attention for:
– ID of HTML element (container), which contains our menu; here: jq_menu,
– the number of elements must be adequate to the overall width of the elements (container, list …) in CSS rules.
3. Styles
So let’s define the CSS for our menu. Most important styles in following snippet:
a {
    font-family: Arial, Helvetica, sans-serif;
    font-size: 18pt;
    font-weight: bold;
    color: #ffffff;
    text-decoration: none;
}

a:hover {
    font-family: Arial, Helvetica, sans-serif;
    font-size: 18pt;
    font-weight: bold;
    color: #ffff00;
    text-decoration: none;
}

img {
    border: 0px;
    margin: 0px;
    padding: 0px;
}

/* menu - main container */

div#jq_menu {
    width: 640px;
    height: 200px;
    padding: 0px;
    margin: 20px auto 0px 20px;
}

div#jq_menu ul {
    border: 0px;
    display: block;
    list-style-type:none;
    width: 800px;
    height: 200px;
    margin: 0px;
    padding: 0px;
}

div#jq_menu ul li {
    float: left;
}

div#jq_menu ul li a {
    display: block;
    border-right: 1px solid #ffffff;
    width: 90px;
    height: 200px;
}

/* menu items */
div#jq_menu ul li.menu_item_1 a {
    background: url(../img/menu_img_1.jpg);
}

div#jq_menu ul li.menu_item_2 a {
    background: url(../img/menu_img_2.jpg);
}

div#jq_menu ul li.menu_item_3 a {
    background: url(../img/menu_img_3.jpg);
}

/* … more items … */
Thus prepared styles provide the right look for our menus.
4. The JavaScript code
Our handling code is based on jQuery and jquery.easing plugin, which offers animation effects.
The whole is actually simple. We define the behavior for the hover event of each menu item (ul > li > a), and the “back”, ie the behavior of restoring the state of a menu item after hover event.
Here is the content of our file — js/menu_funcs.js:
$(document).ready(function () {

    $("div#jq_menu ul li a").hover(function() {

        if ($(this).is(":animated")) {
            $(this).stop().animate({width: "300px"},
                {duration: 360, easing: "easeOutQuad"});
        } else {
            $(this).stop().animate({width: "300px"},
                {duration: 360, easing: "easeOutQuad"});
        }
    },

    turn_back = function () {

        if ($(this).is(":animated")) {
            $(this).stop().animate({width: "90px"},
                {duration: 360, easing: "easeInOutQuad"});
        } else {
            $(this).stop(":animated").animate({width: "90px"},
                {duration: 360, easing: "easeInOutQuad"});
        }
    });

});
In animation process, we set the width of elements after mouseover and mouseout actions. There are also animation parameters, that we can adjust:
– duration,
– easing (“easeInOutQuad” in our example).
Animations are based on jquery.easing plugin. There is a whole list of different animations that are worth a look at by analyzing the code of this extension.
On-line demo:
http://directcode.eu/samples/jquery_tutorial_sliding_menu/index.html
Files available on GitHub:
https://github.com/dominik-w/js_html5_com/tree/master/jquery_tutorial_sliding_menu
Summary
Thus, in simple steps we created a nice, horizontal menu with pictures. We used also animation effects offered by interesting plugin — jquery.easing.
I encourage you to experiment on your own with jQuery.
Greetings!


 Posted in
  Tags:
Tags: 
