
Working with JavaScript often is associated with CSS. And thanks to that, we can acquire practice in the use of CSS, even if we don’t deal directly with creating layouts.
CSS and JavaScript
Good CSS skill broadens our horizons, and helps in developing quick solutions and tricks.
CSS
For a good start — rotate an element in CSS:
.rotate {
    -webkit-transform: rotate(50deg);
    -moz-transform: rotate(50deg);
    -ms-transform: rotate(50deg);
    -o-transform: rotate(50deg);
    transform: rotate(50deg);
}
Sample:
<div style="border: solid 1px red; width: 400px; height: 250px"
    class="rotate" id="test-div">
</div>
In this case, the element will be rotated by 50 degrees.
Setting CSS classes in JavaScript
Probably the most popular task on the border of CSS and JavaScript is to set dynamic CSS classes for an HTML element from JavaScript level.
In “pure” JavaScript we can do it as following, by setting the className attribute:
document.getElementById('test-div').className = 'my_css_class';
Another example from the old school is to set a CSS class to the HTML element on mouse hover, and remove class on mouse out:
<div style="border: solid 1px red; width: 400px; height: 250px"
    id="test-div2"
    onmouseover=this.className='rotate';
    onmouseout=this.className=''; >
</div>
Set and remove CSS classes for the elements in jQuery
With jQuery this task is painless. We can set CSS class using addClass method:
$("#test-div").addClass("myClass myAnotherClass");
whereas the removal will be done by removeClass:
$("#test-div").removeClass("myClass");
We can pass many names as an argument and connect method calls in chains:
$("p").removeClass("oldClass").addClass("newClass");
The above code performs operations for all paragraphs in the document; remove the oldClass class, and then add the newClass CSS class.
Setting particular styles (not whole CSS classes)
Instead of CSS classes, only individual styles can be manipulated. In “pure” JavaScript it’s somewhat tedious, e.g.:
// border style
document.getElementById("test-div").style.border = "solid 1px #00f";
In jQuery we simply use the css() method.
It is used both for getting and setting CSS styles, depending on arguments, e.g.:
$('#test-div').css('border');
Setting CSS style in jQuery looks as following: $(selector).css(property, value).
Example — CSS style setting in jQuery:
$('#test-div').css('border', '2px solid #ffeedd');
To set more CSS styles at the same time, we use the following syntax: $(selector).css({property1: value, property2: value, …}), for example:
$('#test-div').css({'border': '0px', 'margin-top': '180px'});
Image aspect ratio
So simply crop images to the dimensions without the ugly effect of stretching the image (deformation). It’s important in case of creating dynamic thumbnails.
General guidelines using CSS and JavaScript (jQuery) below.
CSS:
img {
    max-width: none;
}

.crop {
    overflow: hidden;
    width: 250px;
    height: 188px;
    float: left;
}
Container:
<div id="pics"></div>
JavaScript code to process image dimensions and to set the appropriate parameters:
var photo_src = 'http://url-to-photo.jpg';

// processing
var img = new Image();
img.src = photo_src; // set source attribute

var ratio = img.width / img.height;
var orig_ratio = 250 / 188; // see: .crop class

if (ratio > orig_ratio) {
    img.height = 189;
    img.width = 189 * ratio;
} else {
    img.width = 251;
    img.height = 251 * ratio;
}

img = $(img);

$('#pics').append($img);
JavaScript code operates on the object image and deals with determining whether he has a vertical orientation (portrait), or horizontal (landscape).
The hover effect with zoom
It’s about operations of lighten the image and its mild enlargement, which gives good-looking effect when you put mouse cursor over the image.
Example of solution below, tailored to work on multiple browsers:
a.image {
    min-height: 189px;
    max-height: 189px;

    opacity: 1;
    -webkit-transform: scale(1,1);
    -webkit-transition-timing-function: ease-out;
    -webkit-transition-duration: 240ms;
    -moz-transform: scale(1,1);
    -moz-transition-timing-function: ease-out;
    -moz-transition-duration: 240ms;
}

a.image:hover {
    opacity: .8;
    -webkit-transform: scale(1.07,1.09);
    -webkit-transition-timing-function: ease-out;
    -webkit-transition-duration: 240ms;
    -moz-transform: scale(1.07,1.09);
    -moz-transition-timing-function: ease-out;
    -moz-transition-duration: 240ms;
    z-index: 99;
}
In this case we assume,
We assume that the results apply only to images inside the link (a.image).
Resources and tools
At the end some resources.
CSS3Maker — is an online tool that generates CSS code for the item based on the effect created visually by us. It supports a variety of effects including transformations, animations, gradients, and other.
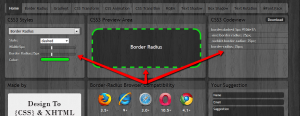
CSS3 Maker
URL: http://css3maker.com/index.html
CSS Menu Maker — a great menu generator:
About CSS we can also recommend:
– CSS reference:
http://www.w3schools.com/cssref/default.asp
Summary
CSS and JavaScript are the topics very extensive, even when we consider them individually. Together is the power of modern applications and websites, and the programmer has a really wide field of possibilities.
$(“#reader”).addClass(“ThankYou”);
 Posted in
  Tags:
Tags:
By the way, a step further… I worked today with a great JS library for making CSS3 animation
http://visionmedia.github.io/move.js/
[…] to the next article from the border of JavaScript and CSS. Today briefly about the tool Less CSS (or CSS/LESS) — JavaScript library, which could help […]