Progress bar with CSS and HTML5 in a few lines of code

A progress bar in CSS for web project? Sure, and it without using images. Today short and to the point.

Create progress bar with CSS and HTML5

We can use HTML5 and Bootstrap, or define our own CSS styles.

Solution #1 — HTML5

Let’s add Twitter Bootstrap and jQuery to our web page, and a simple code as below.

…
  <div class="progress" style="width: 50%">
    <div class="progress-bar" role="progressbar" aria-valuenow="40"
      aria-valuemin="0" aria-valuemax="100" style="width: 40%">
      40% (default style)
    </div>
  </div>

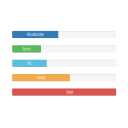
Ready! We have a progress bar. The colors and progress step we define through CSS classes (e.g.: class=”progress-bar progress-bar-danger”) and properties (e.g.: role=”progressbar”, aria-valuenow=”100″). And besides, we set style width of an element.

More examples of progress bars below.

Top jQuery plugins

Top jQuery plugins — March 2016

Hello! We added many new interesting positions to our scripts and plugins library. Here we present a small ranking of top jQuery plugins from March 2016.

Top jQuery plugins from March 2016

Ordered by popularity.

1. Multi-step jQuery form wizard plugin — jquery.steps

The first plugin is a nice way to implement forms in web application: multi-step jQuery form wizard solution. Turn multiple forms into a step-by-step form wizard with nice effects.

AngularJS Tutorial — a simple UI to control elements

Angular in practice! Today we have a small AngularJS tutorial, about creating small UI connected with dynamically created (refreshed) graphical object.

AngularJS Tutorial — control an element with Angular

In the basic course of Angular, we focused on information. Now it’s time to see it in a real example. Today’s simple tutorial in small steps will help us with this.

Step 1.

Let’s create HTML5 document and include AngularJS library.

Step 2.

Define an element, on which we will operate from the level of UI. In our example we will create a simple element using CSS:

.my-elem {
  background: #00c;
  border-radius: 10%;
  position: absolute;
  width: 200px;
  height: 200px;
  max-width: 500px;
  max-height: 500px;

  /* speed */
  transition: 0.8s;
  -webkit-transition: 0.8s;

  /* init pos*/
  left: 100px;
  top: 200px;
}

Learning AngularJS — a basic course part III — summary

In the 3rd part of basic Angular course, we will continue topics from the previous part, as well we will touch next related topics.

Further learning AngularJS

Let’s start with filters. It’s a yet another Angular feature, which takes off a part of tedious work from the programmer. Let’s see them in action, when formatting various kind of data.

AngularJS filters

Try us - https://superpay.me/.

Even in the previous part we could see how simple in use (but useful) the filters are. For example:

…
<p>{{ message.sent | date:'MMM d, y h:mm:ss a' }}</p>
…

Top 5 jQuery plugins and articles — February 2016

Hello! We were to busy to publish next AngularJS articles, but at least here we have some cool stuff. It’s a small ranking of Top 5 resources from our website with web development stuff.

Top 5 jQuery plugins — Feb 2016

Here we go — from most popular.

1. jQuery and Bootstrap show hide password plugin

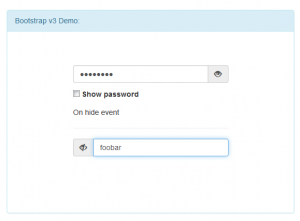
It’s a jQuery plugin, that allows the user to toggle the password input field text visibility by clicking the toggle icon (checkbox). Styling with Bootstrap.

Top 5 jQuery plugins & posts from Feb 2016

Top 5 jQuery plugins & posts from Feb 2016

2. jQuery and CSS3 image direction-aware hover effect

This is a nice jQuery and CSS3 image direction-aware hover effect. The main idea is to slide in an overlay from the direction we are moving with the mouse.

Learning AngularJS from scratch part II

Today we will continue learning the Angular JS framework, by getting to know better the most important parts of AngularJS application, as well by analyzing small practical examples.

Learning AngularJS — further steps

The previous part describes basic aspects of this great framework.

We already know that AngularJS is a JavaScript language framework, and it extends HTML through ng-directives. The previous part of this course shows also a simple example with data-binding. We are also aware of many useful directives, for example ng-init:

<div ng-app="" ng-init="firstName='Joe'">
  <p>The name is <span ng-bind="firstName"></span></p>
</div>

Let’s add AngularJS expressions to this. They exist in double brackets, e.g. {{ expression }} and on them AngularJS can execute its magic. The expressions can also be stored in the ng-bind=”expression” directive.

Learning AngularJS framework from scratch — Part I

AngularJS is an open-source JavaScript library, developed by Google. It greatly assist in Single Page Application / SPA development. Angular extends HTML by own, special tags. The library implements Model-View-Controller (MVC) and Model-View-ViewModel (MVVM) patterns, to help in the development and testing of Web applications.

Learning AngularJS — intro. How it works?

Angular loads HTML containing additional, specific tags, and by handling them, it assigns input and output page elements to the model that is stored as a set of JS variables.

Values can be set manually, as well gathered from a JSON source.

AngularJS_logo

Framework adapts and extends the capabilities of plain HTML, to better serve dynamic content and allowing for automatic synchronization between the model and the view. In short a programmer can save really a lot of hard work.

A brilliant and very strong feature of Angular is data binding, and two-way binding.

No skill — no deal! Full-stack and Front-end Developer required skills

As they say: no skill — no deal! Without proper skills we won’t do too much. Also continuous development of our skills is also important.

It’s not like the old days, when a knowledge of DHTML and PHP was sufficient. Nowadays the developer must know not only various programming languages, but also o lot of tools and frameworks.

Front-end Developer required skills vs the market

Today we will try to look at what is necessary to be a good front-end or full-stack developer. What are the trends, and above all what the market requires (clients, employers).

What are Front-end Developer required skills today? Or full-stack? Industry is growing rapidly in this direction, and many people want to start working as the Front-end Developer, as currently it’s a very hot profession.

Mustache JS tutorial by jQuery and Express application example. Part 2/2.

Welcome to the 2nd part of Mustache JS and Express tutorial. Today we will finish the work begun in part 1.

Mustache JS and jQuery in action

So far we’ve discussed the basics of work with Mustache JS library, prepared test data and the server in node.js. Now it’s time to code the front-end layer!

In our case we will use:

Bootstrap v3.3.5

jQuery v1.11.3

jQuery Easing v1.3 plugin

Ionicons

mustache JS

So the next step will be the html5 page, developed on the basis of Bootstrap.

Especially please note two things — the navigation and Mustache templates.

Using Mustache JS by jQuery and Express application example. Part 1/2.

In this tutorial we will create a web application using great tools — html5, Bootstrap, jQuery, Mustache JS and Express. Step by step. We will also use the ionicons.

Mustache JS

Not everyone (including me) likes templating systems in for example PHP. But here the situation is much different!

Mustache JS is a JavaScript implementation of the Mustache templates mini-engine (logic-less), which was created for many different programming languages: http://mustache.github.io.

Why the Mustache JS (and similar libraries) are cool?

First of all, having the data obtained e.g. from JSON objects, we don’t have to process the data manually. This can be tedious. Instead, we define a small template with placeholders, in which the Mustache engine will interpolate the values. In this way we will get the data integrated with our front-end layer at once.

Having mastered Mustache JS, we can save a lot of valuable time and effort. We will see it in practice.