Prototype JS in a nutshell. Part 3 — summary.

It’s time for the last, 3rd part of basic Prototype JS course, where we focus on the use of forms, associative arrays, strings and others, but this time on the rules of Prototype JS.

Further delving into the Prototype JS framework

Let’s start with the forms.

Form

Prototype JS encapsulates and / or extends to us many aspects of programming, including forms support.

Available methods:

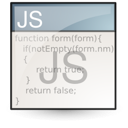
– disable() – deactivate element, for example:

form[form.disabled ? 'enable' : 'disable']();
form.disabled = !form.disabled;

– enable() – activate the element

– findFirstElement(formElement) – find the first element

– focusFirstElement() – go to the first element (item)

– getElements() – get all elements of the form

– getInputs() – get input fields, for example:

var form = $('myform');
form.getInputs();        // -> all INPUT elements
form.getInputs('text'); // -> all text inputs

// only radio buttons with the name "education"
var buttons = form.getInputs('radio', 'education');

// set disable = true for these buttons
buttons.invoke('disable');

– request() – automatically creates the Ajax.Request, where the parameters are built on the basis of form fields, e.g.:

<form id="person-example" method="POST" action="file.php">
…

$('person-example').request(); // sending

// add a callback:
$('person-example').request({
    onComplete: function(){ alert('Form data saved!') }
})

// get
$('person-example').request({
    method: 'get',
    parameters: { interests: 'JavaScript', 'hobbies[]' :
        ['programming', 'music'] },
    onComplete: function(){ alert('Form data saved!') }
})

– reset() – reset of the form fields

– serialize() – serializes form fields — as keys (names) and the fields values, for example:

// Test 1
// 'username=tester&age=22&hobbies=coding'
$('person-example').serialize();

// Test 2
// {username: 'tester', age: '22', hobbies: ['coding', 'JS']}
$('person-example').serialize(true);

– serializeElements() – serializes elements, for example:

new Ajax.Request('/some_url', {
    parameters: $('id_of_form_element').serialize(true)
});

Form.element

Now we will take care about operations on the form fields, including getting their values.

April Fools’ Day in JavaScript

We have JavaScript, we have also the April Fools’ Day, and that is a good opportunity to get away for the ordinary code and have some fun (I know, I know, JavaScript code by itself can sometimes give a lot of entertainment).

April Fools’ Day in JavaScript

First of all — an implementation for today:

getRandomNumber() {
    return 17; // o_O
}

Yes — JavaScript also knows some jokes 😉

And besides I’ve got some JavaScripts for jokers, namely Fool.js:

http://fooljs.com/

By the way, the download link on this website doesn’t work, but you can find it quickly after searching:

https://github.com/idiot/Fool.js/blob/fabed94601dcf833ba6c9ccd6635f3998a05163e/fool.js

Is this code implemented by Mr. T?

fool_js

Anyway the library (actually jQuery plugin) may be helpful in implementing various jokes in JS, such as hiding random items, playing annoying video, etc.

The usage is really simple:

$(document).ready(function() {
  $.fool('rick'); //  Run the Rick Astley prank
});

A small demo-joke available here 😀

Prototype JS in a nutshell. Part 2.

Welcome to the second part of the Prototype JS course. Today we will focus on the elements of the document and performing operations on them.

Prototype JS — further steps

In this part of the course we will work with the DOM, but using Prototype JS approach. So let’s move ahead to discuss further elements of this library.

The Template object

This allows us to get some kind of interpolation; in JavaScript is a handy tool for the presentation of data, e.g. data received from the network and processed.

Example — use of the Template object:

var cart = new Object();
cart.items = [];
cart.items.push({ product: 'Book', price: 24.50, quantity: 1 });

cart.items.push({ product: 'Pencils', price: 5.44, quantity: 3 });

var itemFormat = new Template (
    'You are ordering #{quantity} units ' +
    'of #{product} at $#{price} each' );

var formatted = '';

for (var i = 0; i < cart.items.length; i++) {
    var cartItem = cart.items[i];
    formatted += itemFormat.evaluate(cartItem) + '<br/>\n';
}

Nice possibilities, isn’t it? We simply define a format of data display (itemFormat variable), and then iterate on the data (items collection) to extract the data, that will be substituted in the appropriate places.

Example #2 — using the Template to build URL elements:

var hx = new Template('show.php?lang=#{lang}&cat=#{mycat}&x=#{x}');
var selection = { my_cat: 'books' , lang: 'en' };
hx.evaluate(selection); // 'show.php?lang=en&cat=books&x='

The object “selection” the key “x” is missing. It’s not a problem — simply will be skipped during processing of the template.

Arrays — the different way

We already know how to work with arrays in “pure” JavaScript. Prototype JS gives us additional capabilities for working with arrays, or simplifies standard methods.

Let’s start with iterations.

Implementation of the iterator pattern is used to transition by the next elements of set, array or object.

Prototype JS Framework in a nutshell. Part 1.

Here is the first part of the short courses, describing JavaScript frameworks. The first of these will be Prototype JS.

Prototype JS Framework — from scratch

A little bit of preliminary information appears in the article JavaScript Frameworks — foreword.

The purpose of this article is not to replace the documentation, but the description of the key elements of the library, which is enough for the programmer to understand the rules, and for easy start with coding.

It can also be a “cheat sheet” for already familiar with this framework.

Here we go. Let’s get the library, add to the project, and enjoy its benefits.

Tip: we can also quickly add the Prototype JS framework from CDN:

<script src="//ajax.googleapis.com/ajax/libs/prototype/1.7.1.0/prototype.js"></script>

Using the following code, we see if Prototype JS Framework is properly loaded:

if (typeof Prototype === "undefined") {
    throw new Error("This script requires Prototype JS");
}

// or simply
//if (typeof Prototype != "undefined") {
  // code here …
//}

Let’s get deeper.

The Element object

At the beginning we say about the object element, allowing operations on the elements of the document.

Example — checking if an element is visible:

function isHidden(item_name) {
    if ($(item_name).style.display == "none")
        return true;
    else return false;
}

alert(isHidden('foobar');

The element can be hidden / displayed in easy way; instead of style.display we can use show() and hide() methods:

$('element_id').hide();

The update function — updating an element:

<div id="topSecret" style="display: none;">Invisible</div>
// …
$('topSecret').update('Visible').show();

As you can see, calls of methods can easily be combined.

Utility functions of Prototype JS Framework

Time for the magic of frameworks — special functions.

The $() function — wrapped version of getElementById(), we can specify the element ID, pass the element, and refer to it.

That $() function we meet not only in the Prototype JS Framework — it’s common in other solution of this type.

Example — using the $() function:

// hide selected elements:
$('item1', 'item2', 'item3').invoke('hide');

We can type one or more names (IDs) of elements. And the invoke() method from Enumerable object is used to run the action for all listed items.

The $$() function — double $$ — allows us to select items by CSS classes:

$$('element');

Examples — using $$() function:

// refer to all 'div' elements; the same as using:
// document.getElementsByTagName('div')
$$('div');

$$('#content'); // the same as $('content'), returns an array

$$('li.foobar'); // get all 'li' elements with the class 'foobar'

Pseudo-elements (since version 1.5.1+)

That extended syntax allows us to access the various elements, using the compact syntax instead of verbose code.

JSON format and JavaScript

Welcome to the new article. We touch various topics, and now we feel obliged to write about JSON (JavaScript Object Notation).

It is a lightweight computer data interchange format. JSON is a text format, and you can treat it as a subset of JavaScript.

JSON format in JavaScript

The MIME type for JSON format is application/json. Due to the usefulness and convenience of use is often found in web (and even mobile) applications. JSON is often chosen instead of XML as a data carrier in applications using AJAX.

It is true that JSON is associated mainly with JavaScript, and allows to save entire objects of the language in its notation, however, this format is independent of any particular language.

Many other programming languages ​​support the JSON format of the data by additional packages and libraries. These include ActionScript, C i C++, C#, Java, Perl, PHP, Python, Ruby, and others.

JSON is a great way to serialize the data.

On the official website of the JSON format, we can find a lot of information and tools, including libraries for many other programming languages.

A basic example — use JSON format in JavaScript:

var obj_txt = '{"firstname": "John", "lastname": "Doe", "addr":{';
    obj_txt += '"street": "Ajax Street 77", "city": "Ajax City"}}';

var obj = eval("(" + obj_txt +")");

var str = "Data read from the JSON object:\n";
str += "Firstname: " + obj.firstname + "\n";
str += "Lastname: " + obj.lastname + "\n";
str += "Address - street: " + obj.addr.street + "\n";
str += "Address - city: " + obj.addr.city + "\n";

alert(str);

In a simple way we processed the data from the JSON object.

Example — use JSON with AJAX:

Paste the following content into the file books.json:

var book= {
    "title" : "JavaScript and HTML5 Tutorial",
    "author" : "John Doe",
};

Usually we just send out such data in the HTTP request, but let’s assume that we have stored the JSON data in a file on the server.

Testing code and handling errors in JavaScript

Debug it! In this article we will take a look on testing the code and error handling in JavaScript.

Handling errors in JavaScript

At the beginning would have to say a few words about the need for testing.

We need to test everything! Preferably at each stage of creating the code. And we must take care of the quality of our code!

A good code is not only tested, but also the one that responds to unpredictable situations. This is known as exception handling, and this technique is also available in JavaScript.

Basic error handling in JavaScript

To start with a simple example: using onerror. Let’s suppose that the browser wants to load an image from a file that does not exist.

Example — define reaction for a specific problem (commented purposely):

<!-- <img src="not_existing_foobar.png"
  onerror="alert('An error occured')" /> -->

In this case we will get an alert with information, when loading of the image will be impossible.

Let’s consider another example below. It’s quite useful — tells us about what went wrong in our code when an error occurs.

Example — capture any fault, such as a nonexistent function:

window.onerror = function(sMsg, sUrl, sLine) {
  alert("Error:\n" + sMsg + "\nURL: " + sUrl + "\n Line: " + sLine);

  return true;
}

// call nonexistent function:
nonExistentFunction();

The Error object

Error handling in JavaScript gives us different tools. One of them is the creation and throwing objects created for this purpose (Error object). Such object stores a more detailed error information.

Example — creating an object of Error type, to handle exception:

function divide(iNum1, iNum2) {
  if (arguments.length != 2) {
    throw new Error("divide() requires two arguments");
  }
  else if (typeof iNum1 != "number" || typeof iNum2 != "number") {
    throw new Error("divide() requires two numeric arguments");
  }
/*
  else if (iNum2.valueOf() == 0) {
    throw new Error("Don't divide by zero");
  }
*/
  return iNum1.valueOf() / iNum2.valueOf();
}

alert(divide("a"));
// alert(divide(2, 0));
// alert(divide("a", 0));

A more detailed description of the object Error available on Mozilla Developer Center.

The try… catch… finally construction

The design of this type is found in many object-oriented languages ​​and is used to handle exceptions.

Best solutions in JavaScript — part 2

Update 09-2014 : note — this article has been originally created several years ago, so maybe a little different from today’s standards of good and recommended solutions.

Welcome to the next part about practical examples and solutions in JavaScript. We’ll focus mainly on issues of validation (validator elements implementation). It’s just continuation of the previous article.

Best solutions in JavaScript

And let’s start with a simple validator of file types. This is useful for quickly testing the file type, that user wants to send in the form.

Example — file extension validation in JavaScript:

function checkForValidFileExtension(elemVal) {
    var fp = elemVal;
    if (fp.indexOf('.') == -1)
        return false;

    var allowedExts = new Array("jpg", "jpeg", "pjpeg", "png");
    var ext = fp.substring(fp.lastIndexOf('.') + 1).
        toLowerCase();

    for (var i = 0; i < allowedExts.length; i++) {
        if (ext == allowedExts[i])
            return true;
    }

    // forbidden
    return false;
}

Example of use (with the Prototype JS library):

Event.observe('user_avatar','change',function() {

    // value of the "file" field (our file to test)
    var avv = $("user_avatar").value;

    var errmsg = "Wrong file type!";

    if (checkForValidFileExtension(avv) == true) {
        $("filemsg").innerHTML = "";

        // unlock the ability to send form
        $('registerSubmit').disabled = false;
    } else {
        $("filemsg").innerHTML = errmsg;

        // block the ability to send form
        $('registerSubmit').disabled = true;
    }
});

E-mail address validation in JavaScript

The presented version is able to verify one or more e-mail addresses.

Multiple e-mail addresses separated by comma should be given e.g. in the text box. Thus, you can check the whole list of e-mail addresses.

Best solutions in JavaScript — part 1

Update 09-2014 : note — this article has been originally created several years ago, so maybe a little different from today’s standards of good and recommended solutions.

Today we recommend the first part of best practices and solutions in JavaScript. It is purely practical. We present tips and simple tricks.

Best solutions in JavaScript

An example for a good start — adding a dynamic element to the document (use of DOM):

<div id="some_div">In this element we will add the next…</div>
// dom_create_input.js
function createInput() {
    var input = document.createElement("input");
    input.name = "user_location"; // field name
    input.id = "user_location"; // id
    input.value = ""; // default value
    input.style.width = "150px"; // CSS options

    // readonly, or other options …

    document.getElementById("some_div").appendChild(input);
}

And that’s all.

Another trick is to send the form by clicking the link.

Example — send the form through plain link:

<a href="javascript:document.forms[0].submit()">OK</a>

How quickly set a CSS class for the element in pure JavaScript?

Here is an example:

var cn = "foobar";
document.getElementById("elem_id").className = cn;

Thus, we already set CSS class “foobar” for the element.

OK, and how to obtain the text content from an HTML element using DOM operations?

Example — getting text values from elements such as div, h1, etc:

<h1 id="topic"> Test </h1>
var dTopic = document.getElementById('topic').firstChild.nodeValue;
alert(dTopic);

Let’s move on. How to write the simplest equivalent for the isset() function in JS?

JavaScript Frameworks — foreword

So far, we have described most of the key aspects and features of JavaScript including object-oriented programming, DOM, AJAX. There were various practical examples.

It’s time for another extremely important step: JavaScript Frameworks. And here comes the real fun (and a considerable saving of time).

JavaScript Frameworks

We briefly present the solutions well known by us in practice. Then we will successively describe them, showing its main features, examples, tricks and tutorials.

Let’s get down to specifics.

Prototype JavaScript Framework

Interesting and extensive JavaScript library, developed since many years. It contains many excellent solutions supporting operations on the DOM, AJAX programming, and others. By the way, this is the first JavaScript framework which I had used widely in my projects.

Example:

– $() — the “dollar” function, is used as a shortcut to the getElementById method. To refer to the DOM object in the HTML page:

$("my_element").style.display = "none";

This and other features are also present in other libraries.

– $F() — returns the value of a form field. E.g. for a text field (element) it returns the value of this field:

$F("form_element_id");

– $$() — the “double dollar” function is an engine of CSS selectors. You can use the same selectors, which are used in the stylesheet.

For example, if we want to refer to the <a> tag of the foobar class, we will write:

$$("a.foobar");

The function returns a collection of matching elements.

AJAX object offered by Prototype, is portable between browsers. It has two main methods: Ajax.Request() and Ajax.Updater().

Example — Ajax.Request:

var url = "http://www.foobar.com/path/script.php";

var myAjax = new Ajax.Request(url, {
    parameters: {
        firstname: $F("firstname"),
        age: $F("age")
    },
    onSuccess: function(t) {
        alert(t);
    },
    onFailure: function(t) {
        alert('Error…');
    }
});

Prototype library website.

The script.aculo.us library

It is available under the X11 license, and the base for this library is the Prototype JavaScript framework, so they are often seen together.

Aculo.us extends Prototype JS with animations and various visual effects, or the elements of the user interface based on the Document Object Model (DOM).

Website

jQuery

Powerful (but not huge or slow) and mature JavaScript framework. Among the whole range of features, among others, greatly facilitates the use of common JavaScript operations (including manipulation of the DOM tree), or the great support for AJAX.

jQuery allows you to achieve interesting animation effects, add dynamic page changes, perform AJAX calls, and much more. There is also a huge amount of plugins and scripts based on jQuery.

All results achieved with the help of jQuery can also be achieved without its use. However, the JavaScript code based on “jQ” is incomparably shorter, less complicated, portable (cross-browser), and modern.

Website of the jQuery framework.

JavaScript file

Forms in JavaScript

So far, we have described a number of different topics, and now it’s time for an article about forms in JavaScript.

Forms, especially in combination with CSS and JavaScript, are providing a strong foundation for development of UI elements to interact with the user.

Forms in JavaScript

Handling forms in JavaScript from scratch.

The form markup and document.form(s):

<form name="test">
  <input name="el1" />
</form>

Access to the form object:

document.forms["test"];

Access to the field (element):

document.form[0].elements["el1"];

// another way
document.test.el1;

Being inside of a form we can pass it to a function by this.form.

The checkbox input

<form name="myform">
  <input type="checkbox" name="cb" id="cb" />
</form>

Example — handling checkbox field type:

alert(document.forms.myform.cb.checked);

// or
document.forms.myform.elements["cb"].checked ? "yes" : "no";

Radio buttons

var f = document.forms.myform;
var btn = f.elements["radio"][0];

We get an access to btn.value and btn.checked.

Example:

<form name="myform1" action="index.php" method="get">
  <div>
    <input type="radio" name="radio1" value="x1" />
    <input type="radio" name="radio1" value="x2" />
  </div>
</form>

The radio1 property of this form points to a list of all the fields in the radio1 group, so the reference will look like this:

document.forms.myform1.radio1.length;

For each item in this group can be referenced using square brackets, e.g.:

document.forms.myform1.radio1[0];

// or through the item() method:
var f1 = document.forms.myform1;
f1.radio1.item(0);

So if you need to find out if the first field (index = 0) in the radio1 group in myform1 form is marked, you should write:

document.forms.myform1.radio1[0].checked

// or
document.forms.myform1.radio1.item(0).checked